Friday, August 2, 2013

Fall Wishing You Congrats Card

I was playing around with the new Huntington Paper packet from CTMH (Which is my fav!) and looking at the instructions for the Frosted Card WOTG form CTMH. and with a few changes here is what the results were! Leave a comment and let me know what you think?

 
Beginning with a 12z12 sheet of Slate Cardstock. Cut the cardstock to measure a 4 1/4x 5 1/2 card when folded. Open the card so it lays flat and using a scoring blade score the front side of the card every 1/2 inch till you reach the middle of the card. Flip the card over so that the scored marks are raised on the front. Then using a distressing sponge (such a Tim Holtz's) and slate ink in a swirling motion gently go over the front of the card. The ink will cover the raised areas making them look darker and like a gray wooden fence.  Also ink around the entire edge of card to give it a finished look.


Step 2. Using two pieces of B&T Duo papers from the Huntington Paper packet. Cut the piece of the left 3/4 x 5 1/4. Then cut the piece of the right 1/14 x 4 1/4. Using a pair of scissor cut the bottom to look like banners. Then using the distress sponge again ink the edges of the paper with Barn Red.

Step 3. Cut a 3x2 piece of Bard Red Card stock from the Hunting paper packet and a 2 3/4 x 1 3/4 lighter piece from the packet as well. Ink both pieces with Barn Red.

Step 4. Cut two leaves from the Art Philosphy Stamp set that comes with the Art Philosphy Cricut Cartidge. Then stamp your sentiment on the piece of Colonial White paper using Barn Red Ink. ( choose the Congrats stamp from the 4 My Friend Stamp set). Then adhere the banners to the base of the card. Do not over lap them. Then adhere the colonial white paper to barn red paper. Then adhere Artistian Studs to the colonial white paper as shown above. Next, using pop dots (or foam tape) on the back of barn red card stock adhere it to the front of the card. Then adhere the leaves with part of them underneath the sentiment.
 
Now you have a card that is perfect for a fall wedding or any other occasion you may be celebrating this fall!
Happy Paper crafting!  
 
 
Supplies: Those that are CTMH products I have linked to my OBA.
 
Scoring Blade
Straight Edge Cutter
Scissor
Adhesive
Pop Dots or Foam Tape.


Thursday, August 1, 2013

Sweeten the Deal

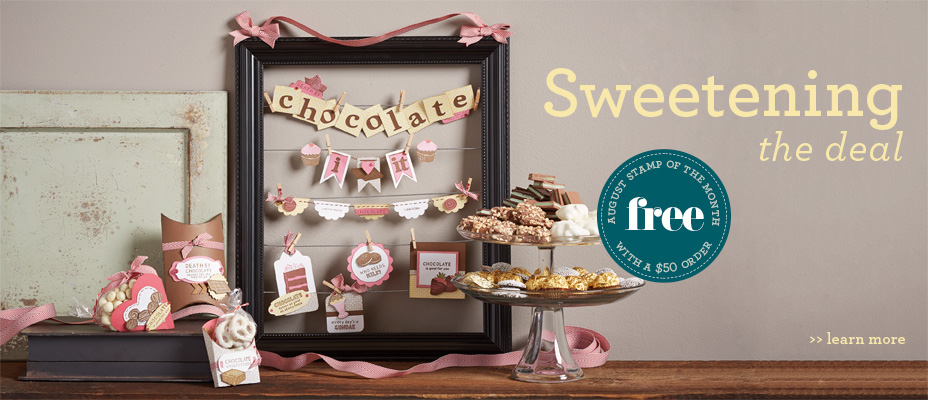
It's officially here! The new Autumn/Winter 2013 CTMH Idea book starts today and to kick of the new products is this awesome deal. Between August 1-31st, 2013 if you spend $50.00's in CTMH products (durning 1 transcation) you will receive the August SOTM for FREE!


To place an order or to check out the new products please visit my webpage stephaniehouck.ctmh.com

Happy Paper Crafting!

Sunday, July 14, 2013

Surf's Up

So Friday night I got to attend the monthly Moonlight Scrapbooking night. It had been awhile since I was able to attend, but I always enjoy going for lots of fun, food and sometimes I actually get some scrapbooking done! So I thought I would share what I did this week and share the instructions with you all if you want to try it. :)

Always the most difficult of the process when scrapbooking is choosing the right pictures and paper. I had photographs of my son from a  recent vacation we took to the ocean. He was convinced he was surfing because he would stand sideways with his arms out as the waves came crashing in and washed over his feet. So with that in mind I decided on using the Surf's Up Paper Packet from CTMH and a 8 1/2 x 11 piece of Kraft Card Stock


Phase One...


I used the Teal and Blue paper from the packet and cut the zip strip off the top of the 12x12 sheet of paper. Reserving it for another project later. I then used a Lagoon Ink Pad and a Sponge and inked the edges of my paper with the ink. Next, using a small pair of straight edged scissors (which you can see in the picture)  I cut the Kraft Cardstock along the 8 1/2 inch side making a wave pattern as I went. I cut a total of 3 pieces and layered them making sure that the bottom was completed covered.
 (2 pieces are shown here). I then inked the edges of the Kraft Cardstock with Desert Sand Ink. I also destressed the Kraft Cardstock with the Desert Sand Ink and  a Destressed background stamp set that resembled mesh like you would seen on a screen door. That gave the sand a wet look to it.


 Phase 2...


So after working on the sand, taking a break to get a snack and talk some more..., I went on to the next phase. I knew that I wanted the sand on the bottom and the background paper to look like water, but I wasn't sure how I wanted the pics to look...So while talking with a friend we looked through the CTMH Make it from the Heart Vol 2. Book and found a layout using three pics on the side and you journal in the middle. BINGO! There was my layout. But instead of journaling I used a pictures in the middle.  The middle pictures is 3 1/2 by 5 and I made 1/2 inch boarder around it with the thatch looking piece of paper from the Surf's Up Paper packet. I then attached a 1 inch strip of sun swirl paper to each edge of the thatch paper and made small straight cuts and then bent some up with my hands to make it look like a beach towel.  I used the same sun swirl piece of paper and cut a 5 x4 rectangle which I  placed behind the middle picture on the right hand side. The three pics on the right are approx. 3 1/2 inch squares except for the middle one it's a little bit taller. The small strip that runs through the middle of the page is one of the zip strips that I cut off the top of the paper.  I then glued everything down on the page and called it a night. But I wasn't done yet...

Phase 3...(this will be posted later, because I am waiting on a stamp set that has surf boards and other tropical things to add to the layout)


However, before I end this blog post for tonight I wanted to share another fun thing you can do with your layouts. This is the same layout framed as a keepsake for a wedding gift. Happy Paper-Crafting!


Supply List for both Layout and Framed Layout


Surf's Up Paper Packet ($9.95) CTMH
Kraft Card Stock
White Cardstock
Lagoon Stamp Pad ($5.25) CTMH
Desert Sand Stamp Pad ($5.25) CTMH
Destressed Background Stamp Set ($17.95) CTMH
Sponge
Pink Flowers
12x12 White Photo Frame
Adhesive


Tuesday, June 25, 2013

Try It Tuesday 6/24/13


This week's Try it Tuesday feature is the Just a Number Stamp set. This set is great for creating Birthday Cards because the set has both the inside and the outside greeting for the cards! If you order it today you'll receive a free THANK YOU stamp just for ordering. Happy Paper Crafting!

Tuesday, June 4, 2013

Try it Tuesday 6/4/13

It's June and what does that mean? It's time for weddings! and CTMH has this awesome stamp set that you can use year round for Happy Couples! So I am featuring it today for Try it Tuesdays! Order this stamp set by 9pm tonight (6/4/13) and receive a special savings of  22% off the retail price. Making it $14.00's. Must contact me to receive the sale price. Happy Paper Crafting!

Saturday, June 1, 2013

New Stamp Sets Are Here!

Celebrate military service and promote patriotism with our new patriotic stamp sets—available only from June 1 to July 31, 2013. Three dollars from each B-size My Acrylix® Courage stamp set and $5 from each D-size My Acrylix® Home of the Brave stamp set will be donated to the USO, the leading, most recognized military-support and services organization in the country. Show your support with your own patriotic stamp set!


To order these stamps sets visit

Thursday, May 23, 2013

Pinwheels

Greetings! I wanted to share this fun springy layout that I made following the example for the May Stamp of the Month (Pinwheel) from CTMH.  I am planning on getting a 12x12 frame from our local craft store and hanging in my living room. If you are interested in making this layout below are the supplies that I used to create it. Happy Paper Crafting!


Supplies: All supplies are from Close To My Heart unless otherwise stated.

Pinwheel (May Stamp of the Month) $17.95 or $5.00 with a $50.00 purchase
Chantilly Paper Packet  $9.95
Artiste Cricut Cartridge  $99.00
Exclusive Stamp Pads (Black, Desert Sand, Blush, Pear, Lagoon and Crème Brule) ($5.25 each)
Make it from the Heart Vol. 1 ($7.95) Pattern 18
Pink Glitter Gems ($3.95)
WORLD (was created using a pre-loaded cartridge on the Cricut Expression2